Configuring metadata (fields and attributes)
Index
3.1 Formulas with number and currency fields
3.4 Formulas with fields related to another category
4 Use metadata to compose the name or description of the document
5 Configure fields to relate documents
7 Adding shared field/attribute groups
1
In the “Fields” step you can define the metadata that come with a document in a category.
For each field you can define its specific behavior (default value, type of data, mandatory or not, locked states, etc.).
All categories have a set of fields which are given by the system, such as the "Properties" field group which cannot be deleted or modified. The fields "Name" and "Description" can be configured so that when creating a new document they are automatically filled with the value of certain metadata. For more information click here.
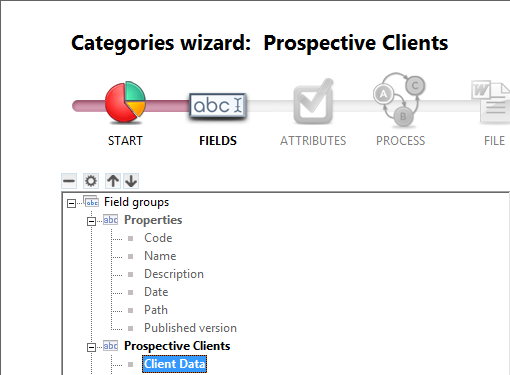
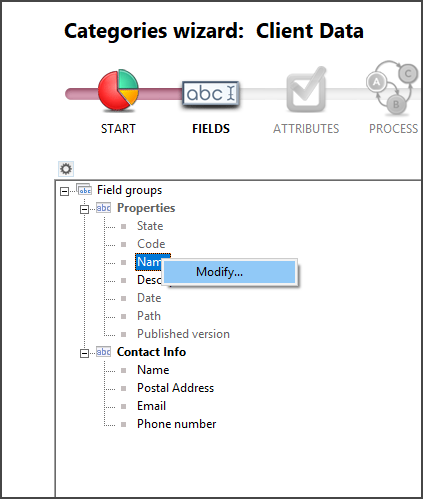
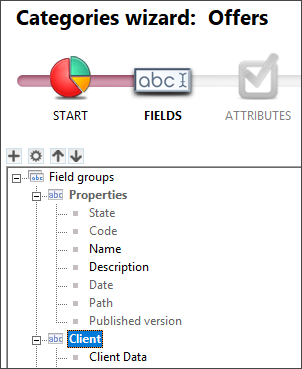
To add fields you will need to open the category details and move to the "Fields" step by clicking the "Next" button in the Categories wizard.
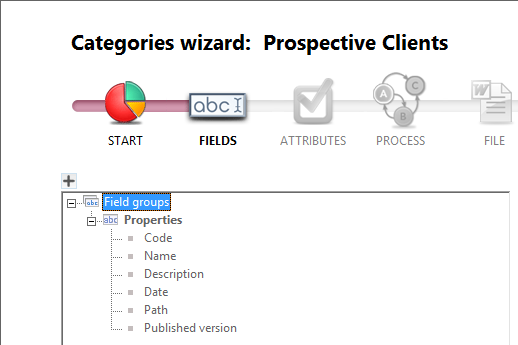
All fields created in R2 Docuo must belong to a field group. To create new fields, first you need to create the group that the fields will belong to.
Selecting "Field groups" will enable the + button on the button bar.
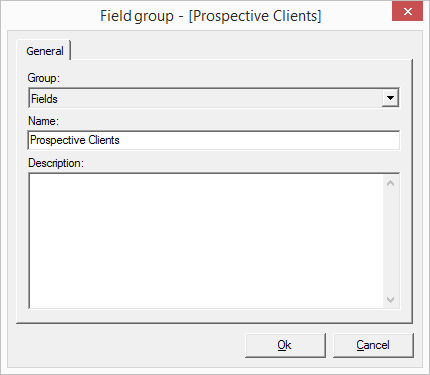
The + button opens the window where you can create a new field group.
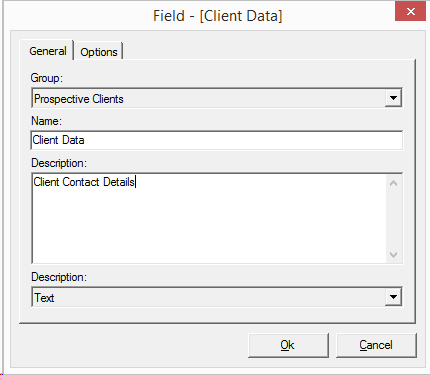
Under name, enter the name of the field group. The description area is where you can define the purpose or use of the field group.
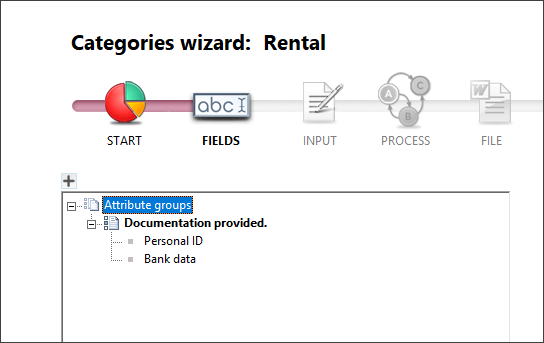
When you select a field group with a description from the details window, a text box will appear containing the literal text of the description.
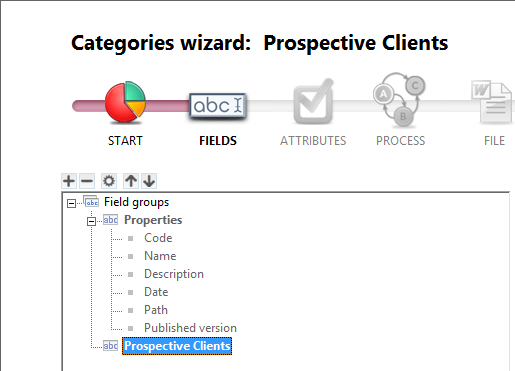
Once you have created the field group you can create the fields which belong to the group.
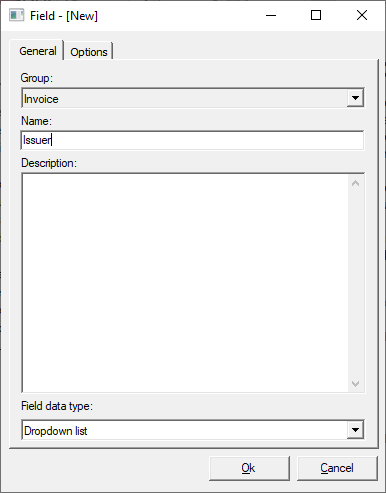
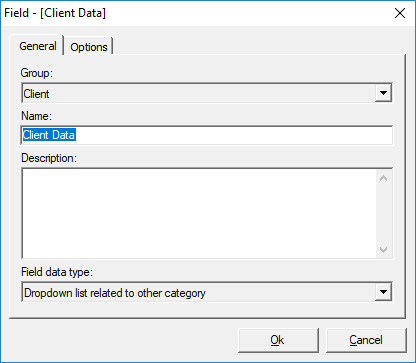
To create a new field select the group that the field will belong to and then click the + button on the button bar.
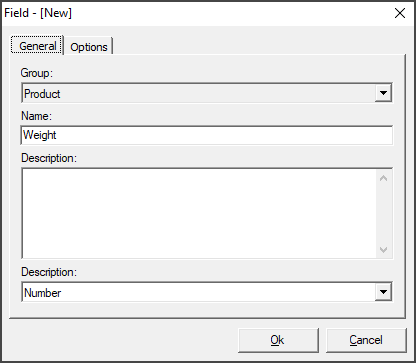
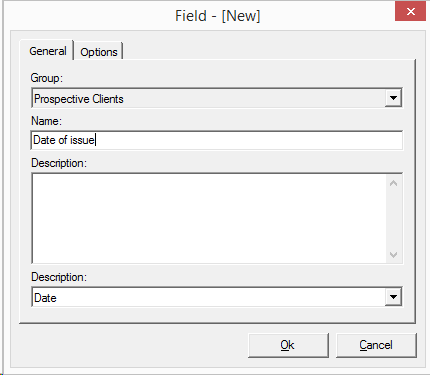
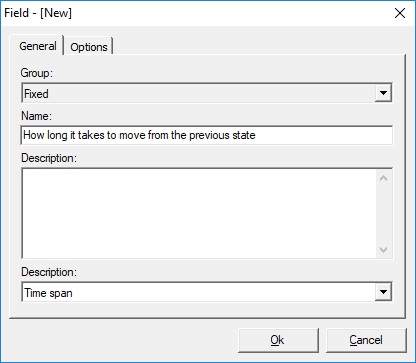
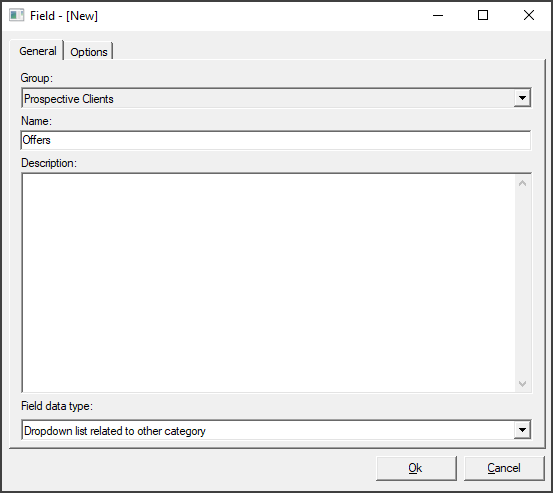
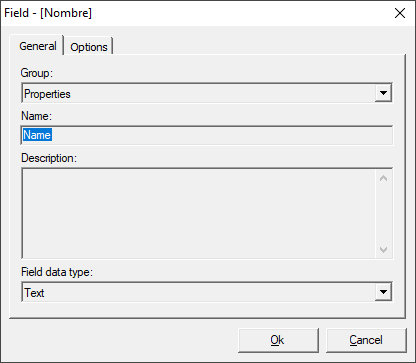
This will open a window where you can create a new field where you can define the name of the field and establish the type of field to be created.
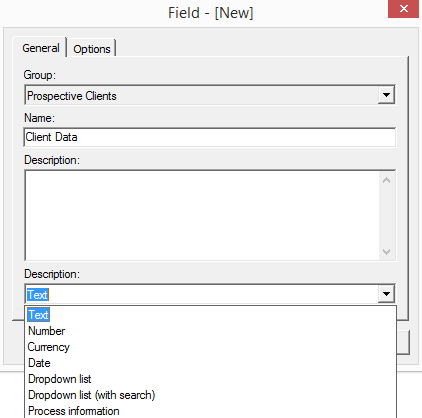
Clicking OK will create the field within the selected group.
R2 Docuo has seven different types of field, each with its own specific characteristics and configuration settings:
Text fields, drop-down list, and search drop-down list can be configured as "Mail ". Mail-type fields allow you to send automatic mail to the address that is set in the field from the details of each document.
The list-type fields link to documents in another category and related field in another category are relational fields. Relational fields allow you to link documents to each other.
Text-type fields can be assigned a fixed format using regular expressions.
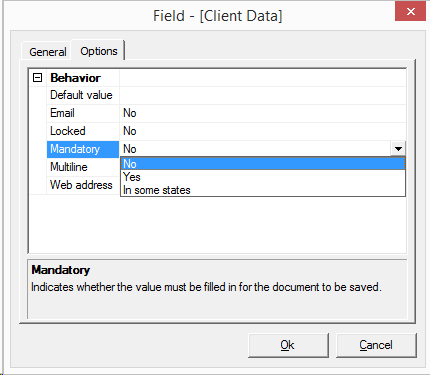
Any type of field, except in the Process information Type field, can be marked as mandatory, single by category or locked, in the case of the categories with process you can indicate the states in which the field has to be obligatory or be blocked.
If you mark a field as "single by category " will not allow you to create two records in the category with which they contain the same value in the field marked how unique by category.
Changes made to fields or attributes are not reflected in the forms.
If the category has forms, there is a manual check that the configuration of the fields is correct.
Text
Text-type fields allow you to enter alphanumerical characters. The "Options" tab defines the field's characteristics by entering the default value or selecting the required behavior from the drop down list.
This type of fields can be configured as "Mail " Selecting the option that corresponds in the field "Content ". Mail-type fields can be assigned as automatic mail recipients, automatic mail will be sent to the address or email addresses that are set in the field from the details of each document.
To be able to write several email addresses in the same field you have to select the option "emails (separated by semicolons) " in the options of "Content "
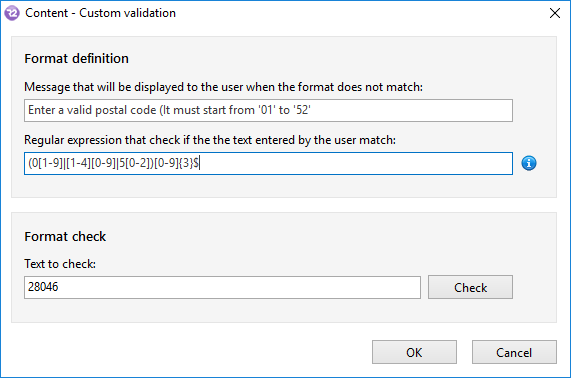
It is also possible to set a fixed format with regular expressions.
From the options when you press the three points that appear to the right of the field "format " opens a window to configure the format of the field using regular expressions.
Number
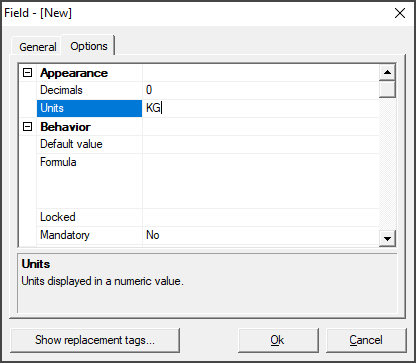
Number-type fields allow you to enter numeric characters only. In the options you can define the number of decimal places that will allow you to write and the type of units (Km, M, etc.) assigned to the field.
In the details of the documents of the category will be shown behind the number set by the user the symbol of the unit.
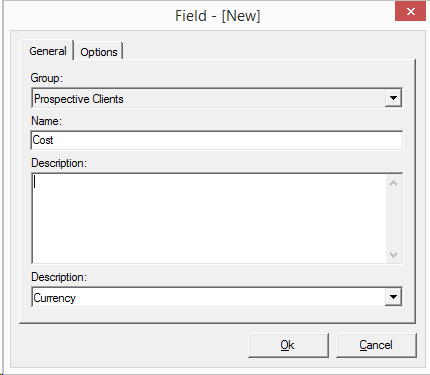
Currency
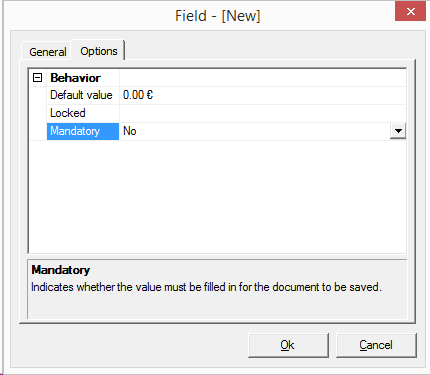
Currency-type fields only allow you to enter numerical values and add a currency symbol. The Options will only allow you to define the field's behavior.
Date
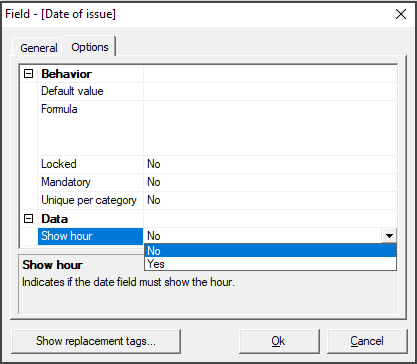
The date-type fields allow you to enter complete dates with the format DD/mm/yyyy or dates with time in the format DD/mm/year hh: mm. The options define the behavior of the field.
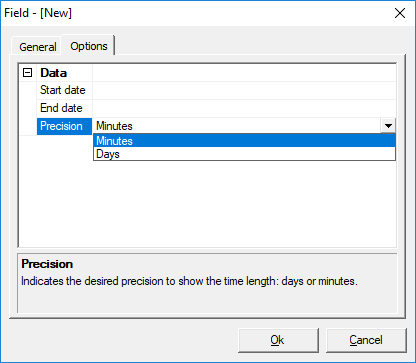
Time
The time-type fields show how long it takes between two dates. The dates on which time is calculated are set in the Options tab, allows you to select Date-type fields created in the category.
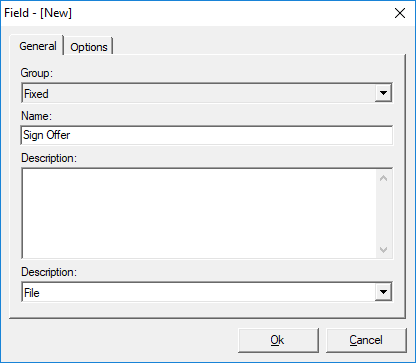
File
File-type fields allow you to store any file type. It is also possible to generate the file from template, convert it to PDF and sign electronically.
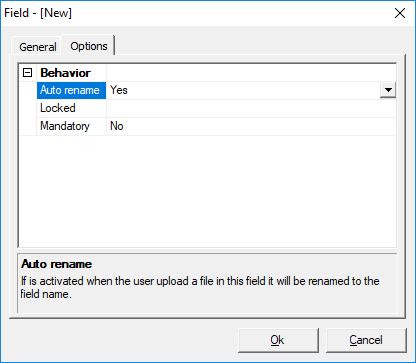
The configuration options can be set if the field is locked, if required, and if the file is automatically renamed with the field name.
If you activate the option "Rename " When uploading the file the original name would be changed and would be renamed as the field "signed offer "
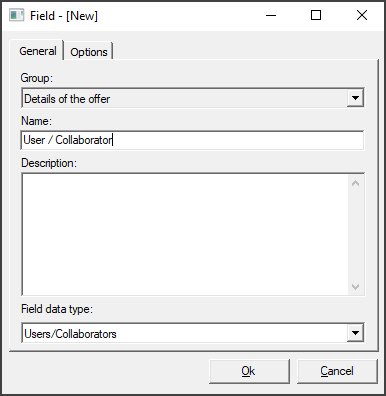
Users / Collaborators
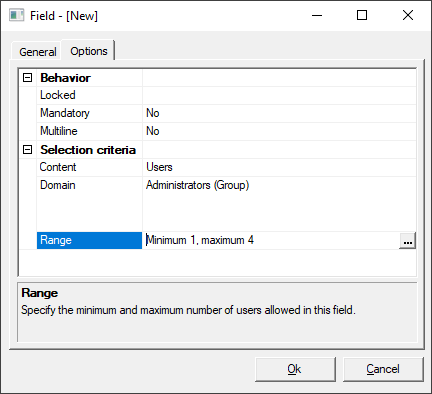
This field allows you to select users or collaborators created in R2 Docuo to later use them as recipients of automatic mails. In the options tab, basic options and selection criteria are configured.
In the "Content" are defined if users, collaborators or both will be shown
In "Domain" the groups or users / collaborators that can be selected in the field are established
The range field is used to define the minimum and maximum number of users that you can assign to the field.
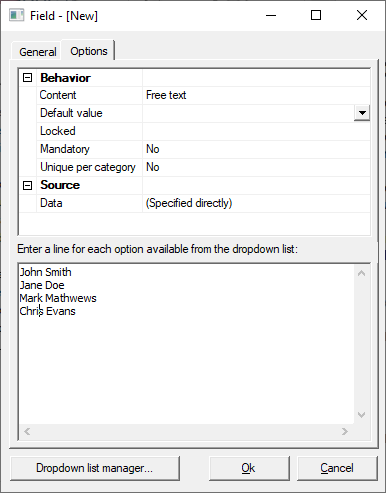
Drop down list
These fields comprise a list of fixed values which are established in the Options tab. In the document details view they will appear as a drop down list from which you can select the required value. The Options tab not only defines the values that make up the list but also establishes the field's behavior.
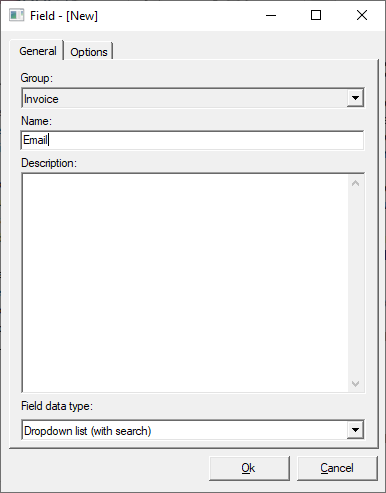
Drop down list with search
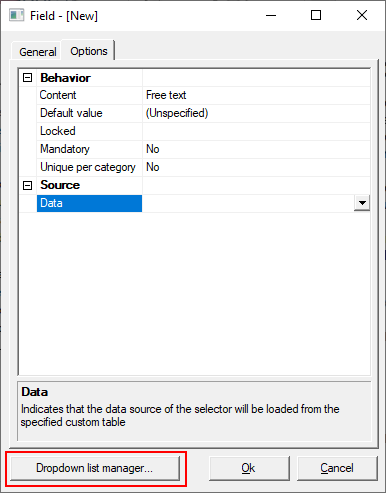
These fields are similar to those of the drop down list type but allow you to search for values by entering part of the text. The Options tab establishes the source list for the data and the field's behavior. You can create a list through the button "Dropdown list manager" or by accessing the manager through the R2 Docuo configuration settings.
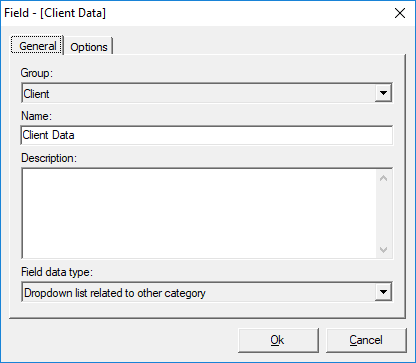
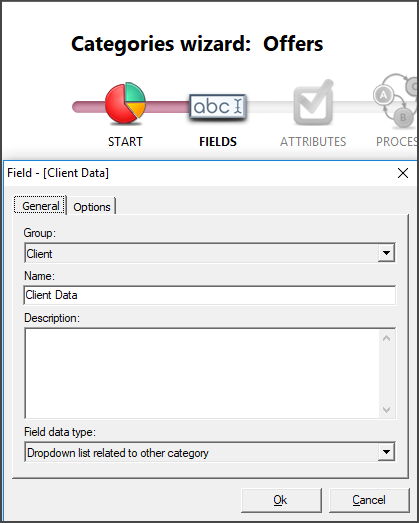
Drop-down list to another category (related field)
These fields are used to relate documents to each other. They work as a drop-down list that shows the name of all documents created in a certain category.
The category that will serve as data source to the list is specified from the options tab using the three points that appear to the right of the "category" field.
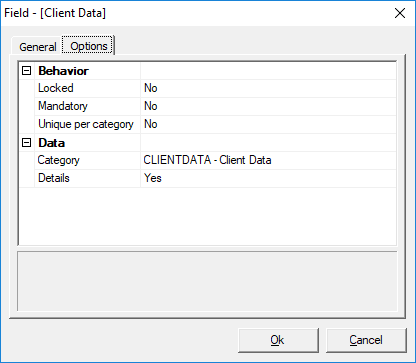
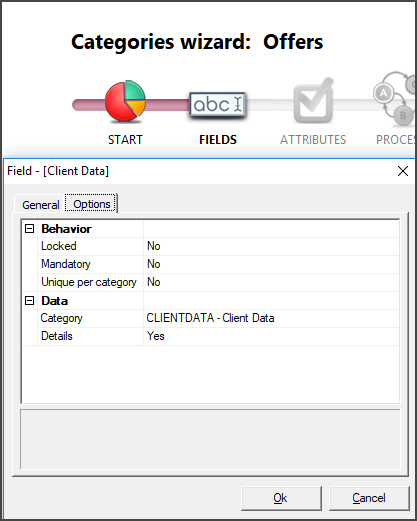
The "Content" field allows you to use substitution labels to define the fields that will be used to name the records in the drop-down list. If no label is established, the code and the name of the document will be displayed.
In the "Details" field, it is defined whether a direct access to the category of the related documents will be shown in the details of the documents of the selected category (in the example C.CONF- Contract). For more information click here.
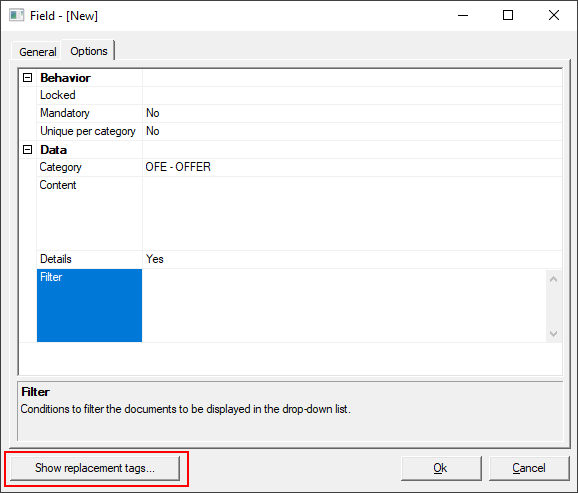
The "Filter" field allows you to configure syntax formulas to filter the results that are displayed in the list. For example you can filter so that only documents that are in a certain state appear.

In the example image, the field has been configured so that only pending offers with a date greater than or equal to 2018 appear.
Below are some examples of syntax:
= Equal
< Less than
<= Less or equal than
> Greater than
>= Greater or equal than
<> Different
LIKE '%...%'
IN ('TAG1','TAG2')
NOT IN ('TAG3')
AND For additional
OR For additional
For more information about the formulas in the "List to another category" fields, click here
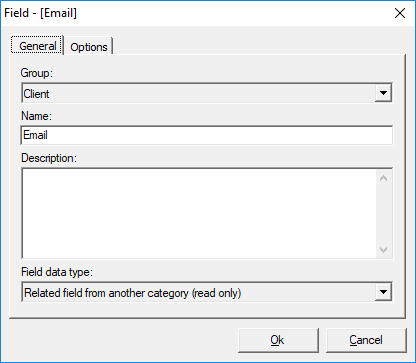
Field of type related field of another category (related field)
They are used to show the value of certain fields of the related documents. This type of field is only available when the category has at least one field type lists documents of another category.
In the field "field" of the configuration options, the field type drop-down list of the document from which the data will be collected is defined.
In the "related field" field, the field from which the value will be displayed when creating a new document is established.
For more information click here.

Process information
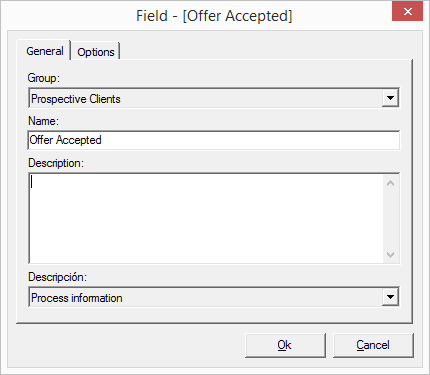
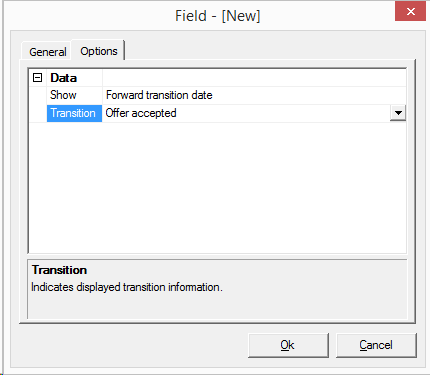
This type of field is only available when the category has a process. These are system fields and are automatically filled out when moving forward a state with the information on the user who carries out the transition or the date on which the transition is performed.
The Options tab establishes the transition for which the information will be obtained and whether the information to be shown is the transition date or user who performs the transition.
R2 Docuo allows you to create formulas using fields of type text, number, currency, or date. To create formulas previously the category has to have created the fields that will serve as operands of the formula.
For example to create a field that calculates the total price the category should have a number field to enter the number of units and a currency field in which the price per unit is specified.
Formulas with field type number or currency
In the tab "options", of the fields that allow to use formulas, appears the section "Formula". In this section you must add the arithmetic formula using the substitution tags of other fields. To start click the button next to the formula field with "..." to open the formula editor (This "Formula editor" will be the same used for all filed types that can be used in a formula)
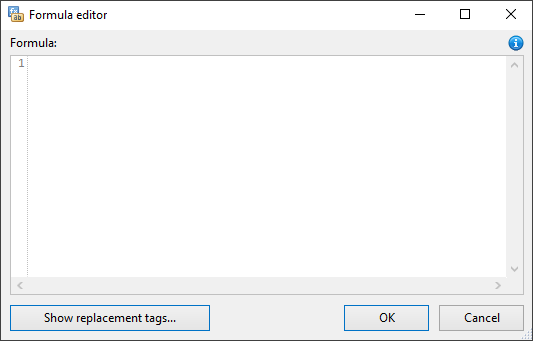
This window will allow you to drag and drop the replacement tags of other fields and add specific formulas. You will see this field in every formula you create in every data type.
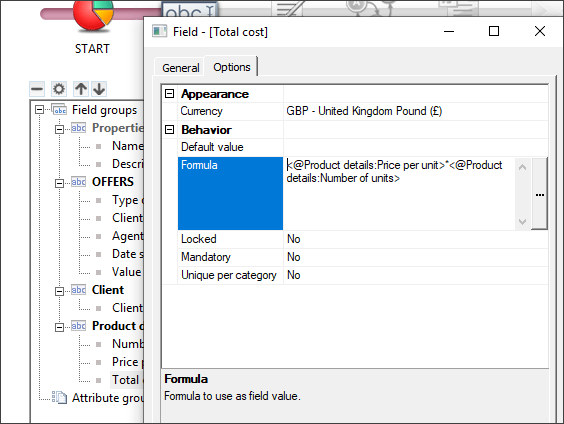
The example shows how to create a formula that calculates the total price, for this you use the tags in the field in which you specify the price per unit (currency-type field) and the field label with the number of units (field type number).
From the button "See Replacement tags" You can see the tags of the fields created in the category. For more information on the labels on R2 Docuo click here.
Some examples of formulas that can be used for fields such as currency and number are:
– Sum: <@FieldGroup:Field1> + <@FieldGroup:Field2>
– Subtraction: <@FieldGroup:Field1>-<@FieldGroup:Field2>
– Multiplication: <@FieldGroup:Field1> * <@FieldGroup:Field2>
– Division: <@FieldGroup:Field1>/<@FieldGroup:Field2>
You can enter formulas of more than two operands, use constants, parentheses and more complex mathematical functions.
– Sum of 3 fields: <@Group:Field1> + <@Group:Field2> + <@Group:Field3>
– 20% of the value of a field: <@FieldGroup:Field1> * 0.2
– Radius Circle area = field: Math. PI * Math. Pow (<@FieldGroup:Field1>, 2)
For a complete reference to the supported mathematical functions, please refer to this link.
Formulas with date-type fields
For date-type fields, you can create formulas that display the result date of adding or subtracting time to another date type field and formulas to show the time difference between two dates.
Formulas to add or subtract time to another date type field
The formula for adding or subtracting days to a Date Type field is as follows:
Date.dateAdd ('interval', increment, date)
Interval:
y → Year
q → Quarter
m → Month
d → Day
w → Week
h → Hour
n → Min
s → Second
ms → Millisecond
To create a field that you add or subtract days to a date first you must create the date Type field that will serve as operating and then create the date Type field where the formula is set.
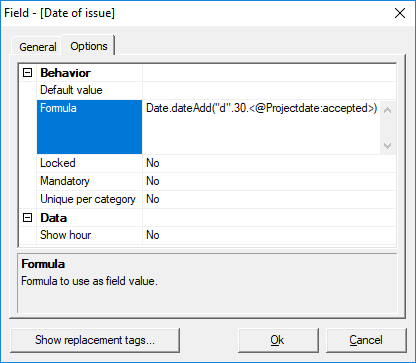
The following example will show you how to create a field that calculates the maximum delivery date of a project assuming that the maximum delivery date is 30 days after the date of acceptance.
Once created the Project acceptance Date field, a Date-type field is created by completing the formula previously provided as follows:
In "interval" specifies the letter corresponding to the interval that we want to add, for example for days would be d.
"Increment" sets the label for the field that displays the number of days for the project to be delivered or, if it is a fixed value, the value is added
On "date" the label for the project acceptance date.
Calculate the time difference between two dates
The formula for calculating the time difference between two dates is as follows:
Date.dateDiff ('Interval', Date1, Date2)
Interval:
y → Year
q → Quarter
m → Month
d → Day
w → Week
h → Hour
n → Min
s → Second
ms → Millisecond
To create a field that shows the time difference between two dates first you must create the date type fields that will serve as operating and then create the field of type number where the formula is set.
The following example will show you how to create a field that calculates the number of days from the date you sent an offer to the date of acceptance.
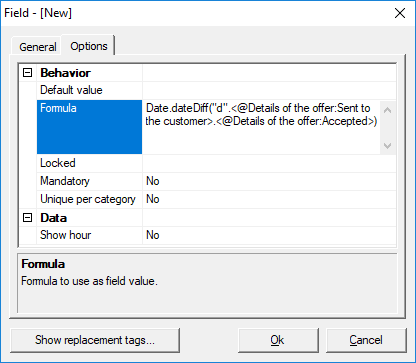
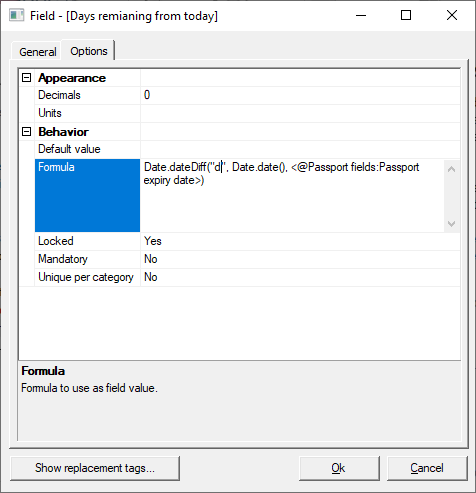
Calculating the days remaining from the current date till the date specified.
Date.dateDiff("interval", Date.date(), Date field)
In the following example the formula shows in a number field the amount of days remaining from the current date till the passport expiry date. (with all formulas this one is updated once the document is saved or any manual or automatic transitions are made)
The two fields:
Date.dateTime()
Date.date()
Have been added to the formulas tab in the replacement tags window, these will represent the current date with time and without.
Formulas with text-type fields
You can create multiple formulas in a field that has a data type "Text" Like other formulas create a new field with the data type text and in the options tabs select formula and use the "..." button. Now in the formula editor you can open the replacement tags with the "Show replacement tags..." button. Now you can drag and drop the fields that you require to be apart of the formula.
In the editor you can use JavaScript to help create your formula. However if you are not sure on what JavaScript to use you can use the "Formulas" tab to help. All text field formulas start with "String". The image below shows the example of two name fields: First and Surname being brought together in a read only text field we created called "Full name" with a space indicated with either single or double quotations marks.

There are many other text related formulas you can create, for example:
Duplicating text
Converting number fields to text
Converting date fields to text allowing a different format example changing from MM-DD-YYYY to DD-MM-YYYY
Converting from upper case to lower case and vice versa.
The formula tab in the Replacement tags window will show you all the options already pre-designed.
Formulas for displaying in a field the number of related documents in another category
You can create a formula that lets you count the number of related records between two categories.
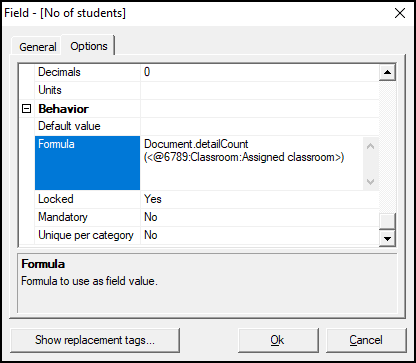
The formula for calculating the number of related documents between categories is as follows:
Document. DetailCount (< @Category code: FieldGroup: Field >)
To create a field that displays the number of related documents in another category, you must first create the relationship between categories and then a number field in which the formula is applied.
For more information on how to relate categories click here.
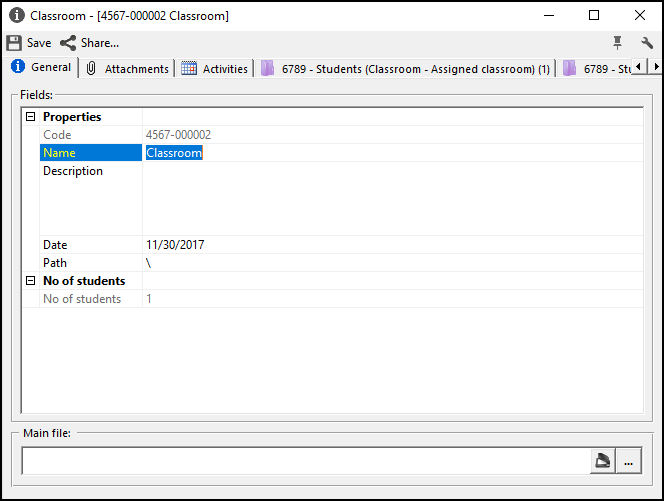
The following example shows how to create a field that shows the number of students in each classroom.
Suppose we have a category called "classrooms" and another called "Students".
In the category "Students" there is a field "classroom" in the group "assigned classroom" of type drop-down list to another category, that allows to select the "classroom" to which each student is assigned.
In the category "classroom" we could have a numerical field with formula that shows the number of students in each classroom.
Formulas may take a few seconds to update when the value of a field that affects a large number of records is changed.
Calculating the Sum, average, maximum and minimum value of the values in related records.
You can create formulas in one category that calculates information from the values of related documents including:
The total sum of all values
The average value
The maximum value of a record
The minimum value of a record
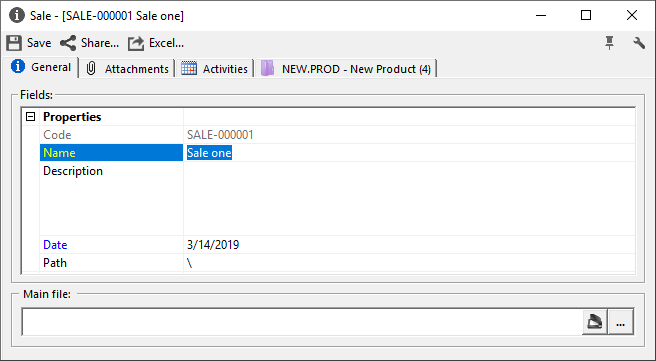
Let us say we have a category called "Sale" and a related category called "Products" so each record in "Sales" can have a list of products related to that record.
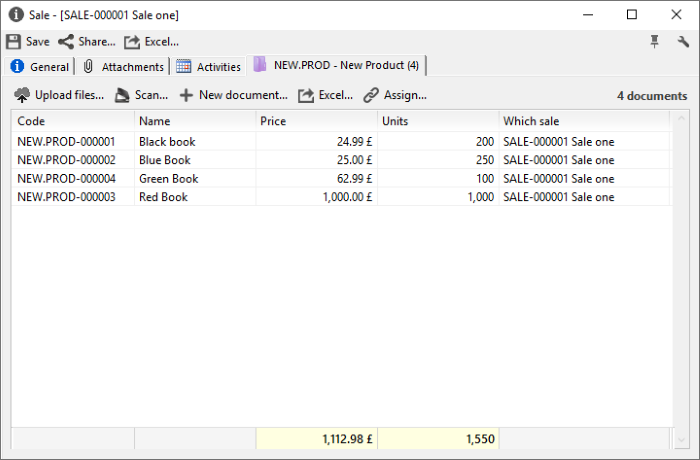
And related to this sale is four products of different prices and quantities.
In the "Sale" category manager we can create a new field with the data type number for the units or currency for the prices of the products. Then in the options of each field we can in the formula field use the button "Show replacement tags" here you will have all the formulas all ready created to be dragged and dropped into the formula field depending on what you need.
The formulas are:
Document.detailSum(<@Category code:field group: Related Field>, <@Category code: Field group: Field value>)
Document.detailAvg(<@Category code:field group: Related Field>, <@Category code: Field group: Field value>)
Document.detailMax(<@Category code:field group: Related Field>, <@Category code: Field group: Field value>)
Document.detailMin(<@Category code:field group: Related Field>, <@Category code: Field group: Field value>)
Regulations for "List to another category" fields
The fields "List to another category" allow to create syntax formulas to filter the results that appear in the list. Formula sequences can be created in such a way that only documents that meet the two conditions are displayed, for example that has a delivery date greater than x day and that the status is "Pending"
To create the syntax formulas you have to use the tag viewer that appears when you select the "Filter" field in the "Options" tab of the field
The label viewer of these fields shows the labels the original category and the related, you can use labels of the two categories to create the syntax formulas.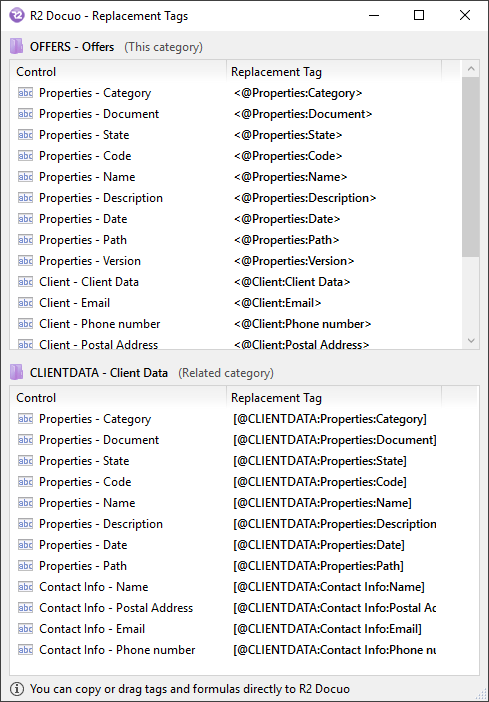
To create the formula you have to copy and paste the labels and add the necessary operators, these are some examples of syntax
Examples of syntax:
= Equal
< Less than
<= Less than or equal to
> Greater than
>= Greater than or equal to
<> Different
LIKE '% ...%' (replace ... with the desired value)
IN ('value1', 'value2')
NOT IN ('value3')
AND and
OR or
The formulas are composed as follows the label of the field on which the condition is going to be placed, the operator of the condition and the value by which it will be filtered in single quotes.
For example to only show the offers of projects that are in pending status you have to put
<@Properties: State> = 'Pending'
To add more conditions, the AND operator is used, for example, to only show those with a shipping date greater than or equal to 1/1/2018, write "AND" and then put the labels and conditions as explained in the previous point. .
<@Properties: Status> = 'Pending' AND [@OFE: Details of the offer: Sent to the client on]> = '01/01/2018'
These are some examples of syntax formulas
Show only the documents of a state:
<@Properties: State> = 'nameofstate'
Show the documents by filtering by dates (use the corresponding operator in the example that has been used Greater than or equal to)
labelofthedate> = 'date'
Filter documents with a certain value in the name
<@Properties: Name> LIKE '% ...%' (replace ... with the desired value)
NOTE: Any incorrect formula or label used will show an error when trying to save
Use metadata to compose the name or description of the document
The fields "Name" and "Description" can be configured so that when creating a new document they are automatically filled in with the value of the metadata created in the category.
To make the name or description of the documents generated with the values of the metadata, substitution labels must be added in the configuration options.
With the "Modify" option that appears when the "Name" or "Description" fields are selected with the right mouse button, the configuration options are opened.
From the "Options" tab in the "Default value" field, substitution labels are established relative to the fields that will be used as source to configure the name or description of the documents.
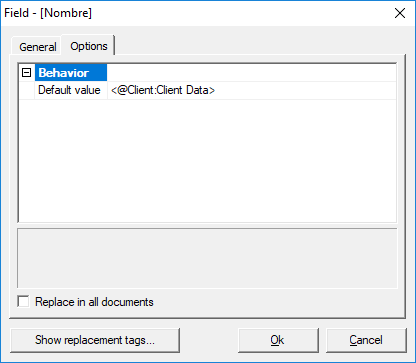
In the example, the label of the "Name" field of the field group "Contact Info" has been added. When creating a new record in the category, the name of the document will take the value that appears in the "Name" field of the "Contact Info" field group.
Replace labels in the name and description of existing documents
To have the labels replaced in all the documents that are already created in the category, check the "Replace in all documents" check box and accept.
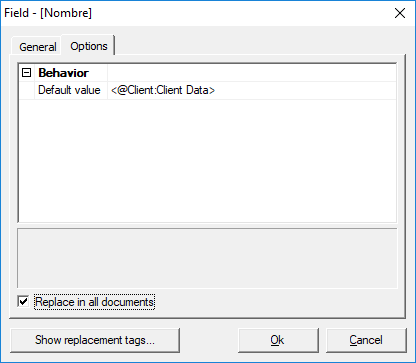
By accepting the changes and ending the category wizard, the name and description will be replaced in all documents created in the category.
Configure fields to relate documents
The relationship between documents is made by associating relational fields (fields types drop-down list to another category or fields type related field of another category) to the category.
Relate documents
To relate documents you have to create a field type "Drop-down list to another category" and define the category of documents with which you are going to create the relationship.
In the options tab of the "Drop-down list to another category" field, select the category that will serve as the data source to the list.
In "Details" it is established if a tab will be displayed in the document's details window with the list of related documents.
When activating this option, a tab with a direct access to the category of the related documents will be shown in the details of the documents of the category specified in "Category". In this tab only documents that are related to the document from which the query is being made are displayed.
For more information click here.
For example, to associate bids to offers, you have to create a drop-down list field for another category in the offers category and in the options in the field select the Customers category as the source of the list.
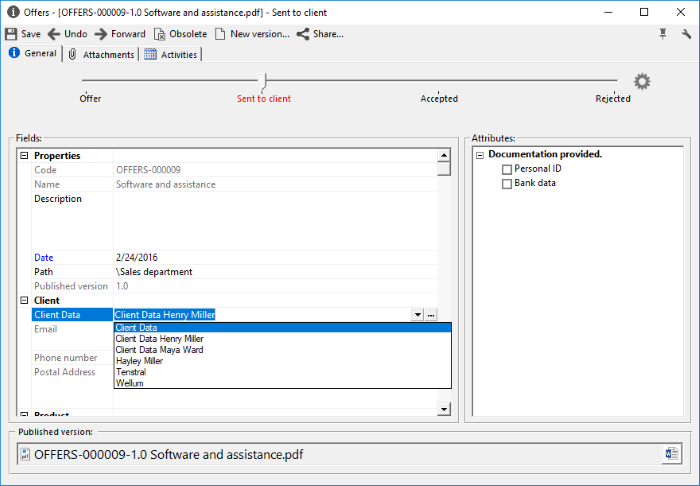
From the details window of the documents in the "Offer" category, when you open the list, all the customer records created in the "Customers" category will appear.
Selecting a value from the list and saving relates the offer to the selected customer.
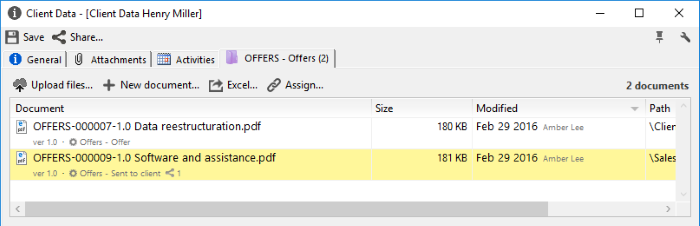
In the case of the categories that have "Yes" selected in the "Details" drop-down when opening the details of the related document, a tab with direct access to the category appears.
In the example, when you open the details of the selected customer, a tab appears with the direct access to the "Offers" category where you can see the details of the offers related to the client.
Relating documents and metadata
To show the information of certain metadata of the related document you have to create type fields "Related field of another category".
Fields related to another category can only be created if the category has a field such as List drop-down to another category.
For example, you can relate the customer files with the offers so that when you create an offer and select a customer, the client's data is automatically filled in (Reason, Mail, telephone, etc.).
To create the example described above from the "Offer" category, a "Document drop-down list" type field is created for the Customers category.
Then a field type "Related field of another category" is created for each field of the category "Clients" that will be displayed in the "Offer" category.
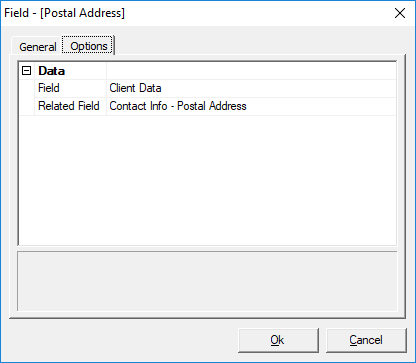
In the type of field you have to select "related field of another category" and in the "Field" of the options tab, select the field type drop-down list of documents that will serve as data source.
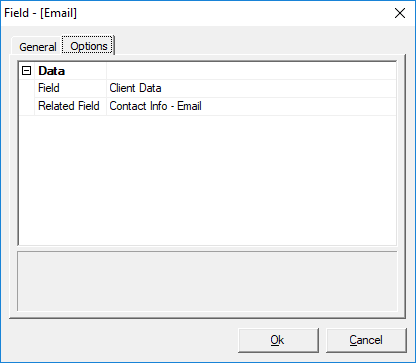
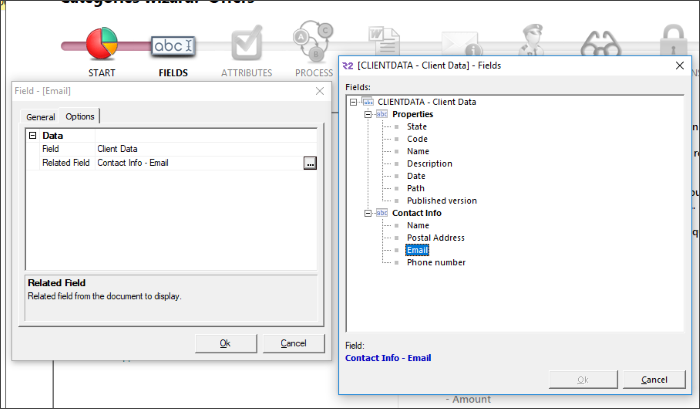
In the field "Related field" pressing the three points that appear on the right, select the field from which the value will be displayed. You can display any field from the related category including any file fields and the main file itself.
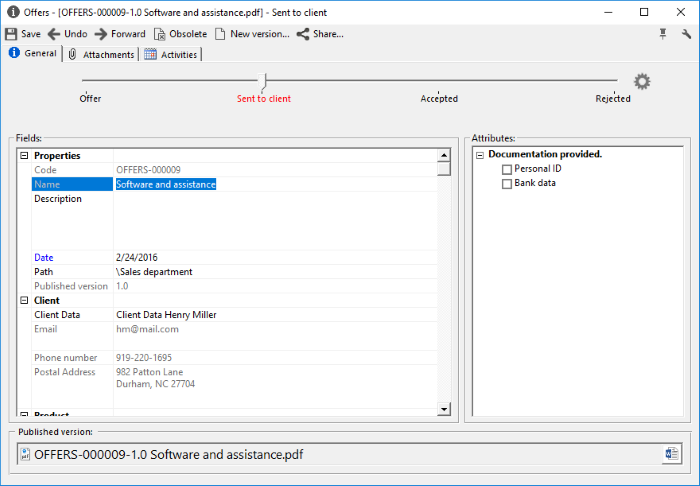
Once the category has been configured from the field window when selecting a customer tab, the values of the related field will be shown in the fields of type Related field of another category.
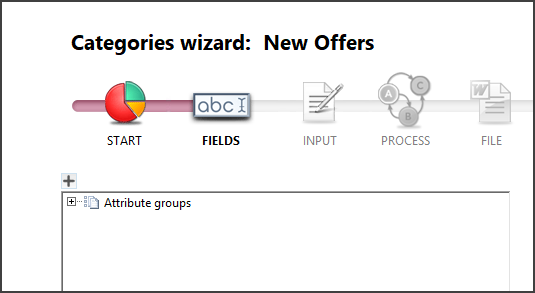
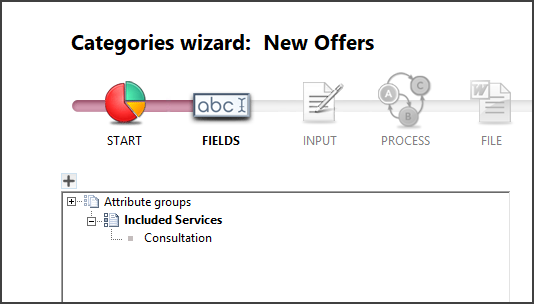
Adding attributes
From the bottom of the list of the step "Fields" the "Attributes" are created. Like the fields, the attributes have to belong to a group.
By selecting "Group of attributes" the + button is enabled.
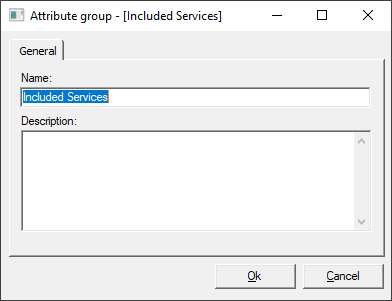
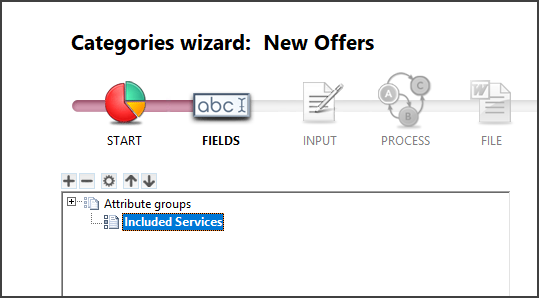
Clicking the + button will open the window where you can create the new attribute group.
Selecting the name of the attribute group and clicking the + button will open the window where you can enter the name of the attribute.
Attributes do not have an options tab, you can only mark whether the attribute is checked by default when a new document is created in the category.
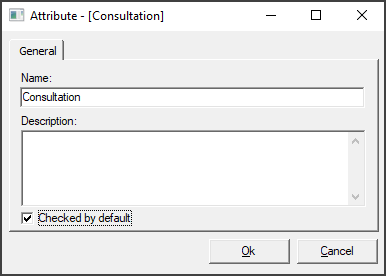
Clicking OK will create the attribute within the selected attribute group.
Adding shared field/attribute groups
R2 Docuo has the option to share field and attribute groups between different categories. This action makes it easier to create metadata in the Categories wizard but does have its own risks.
Changes made in shared field or attribute groups will affect all of the categories to which they are assigned.
For example, if you create the "Client data" field group in the "Quotation" category it can be used for other categories, such as offers, incidents, queries, etc.
If you add a new field to the "Client data" field group in the "Offer" category it will also be added to all other categories to which the field group is associated.
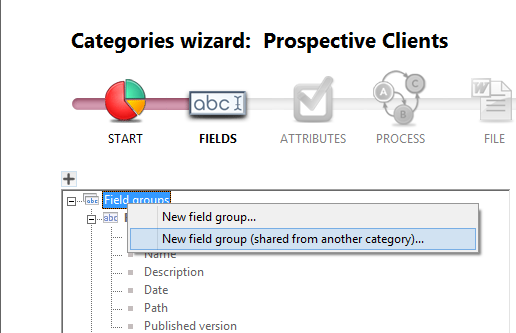
Creating shared field groups
To create shared field groups you need to go to the "Fields" step and select "Field groups" with a right click of the mouse. In the Options list select "New field group (shared from another category)...".
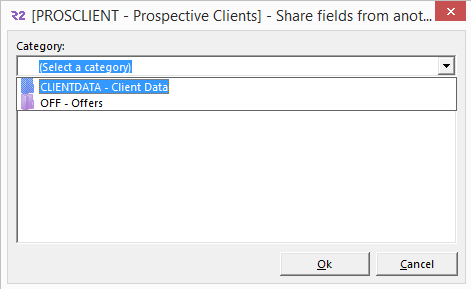
A window will open so you can select the category from which the field group will be shared.
When you select the category all the associate metadata will appear. Select the field group to be shared and click OK to save the changes.
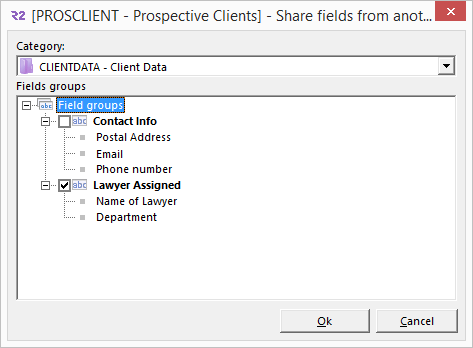
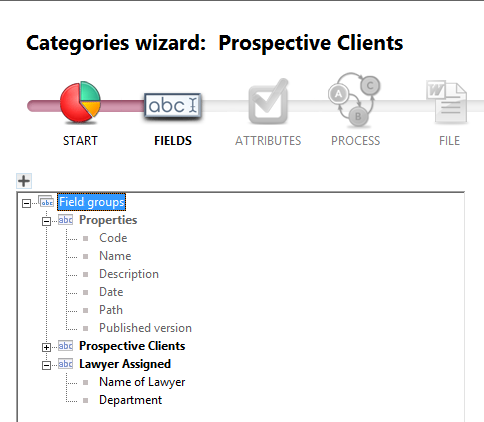
The fields list will display the shared field group in green letters.

Unsharing field groups
When you unshare field groups, metadata values in the documents created in the category will not be changed or deleted.
You have an option to unshare field groups. In the event that a change made to a field group must only affect a specific category, you can stop sharing the field group.
To stop sharing field groups you must open the wizard of the Category whose field group will no longer be shared and from the "Fields" step select the share field group with a right click of the mouse.
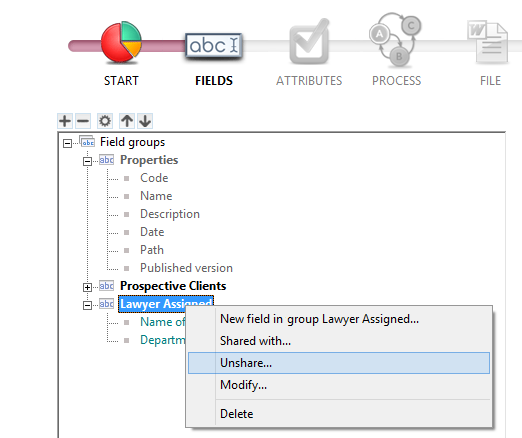
In the list of options select "Unshare". A message will appear to confirm this change.
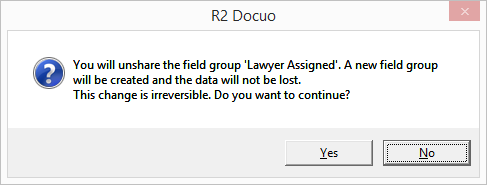
Clicking OK will unshare the field group.
Creating shared attribute groups
Shared attribute groups are created in the same way as shared field groups.
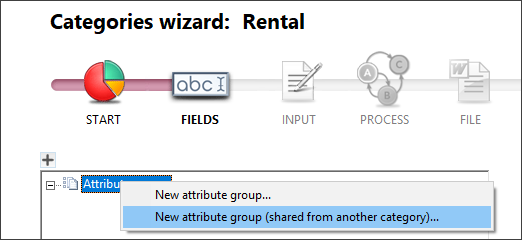
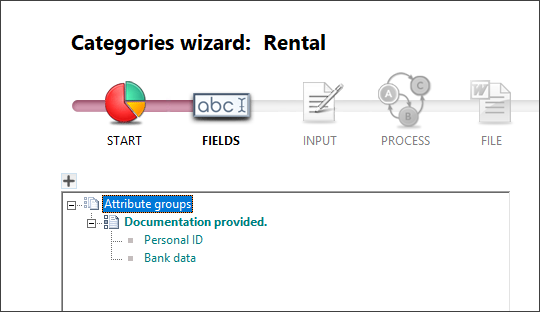
From the "Fields" step of the category in which the attribute group is going to be shared, "Group of attributes" is selected with the right mouse button. In the options "New group of attributes (shared from another category)" is chosen.
Select the category from which to share the attribute group and check the group of attributes to be shared.
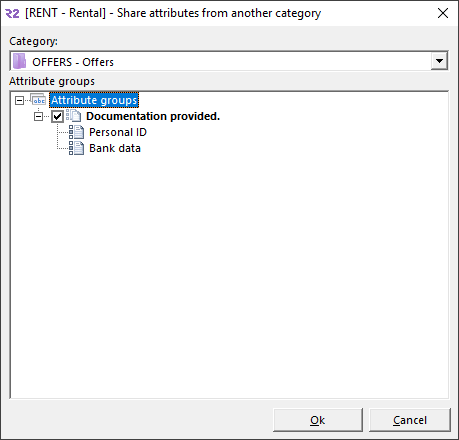
Clicking OK will create the shared attribute group.
Unsharing attribute groups
As in the case of field groups, attribute groups can also be unshared.
To stop sharing attribute groups you must first select the attribute group with a right click of the mouse and then click "Unshare" from the list.
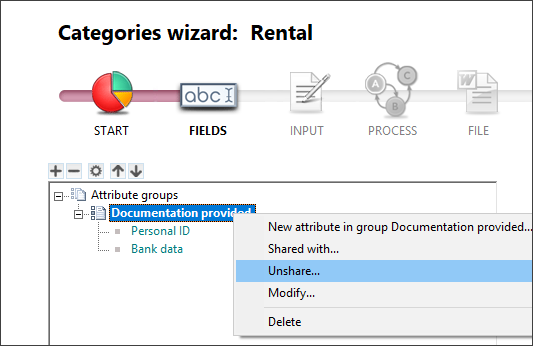
Clicking OK will unshare the group of attributes.